
THE EASIEST CUPCAKES EVER
February 11, 2016

This really simple recipe for plain, vanilla cupcakes is one that both of us have been making since we were young. I think we've probably known it off by heart since we were about 4, so if you don't already know about this recipe, you should! It's really easy to remember and makes a delicious, light, spongy cake. You can use this for a whole cake as well as cupcakes and it's super easy to modify to make different flavours (for example to make chocolate cake all you need to do is take out a little of the flour and replace it with cocoa powder). We used this recipe for our Extreme Chocolate Cake in a previous post. The basis of the recipe is that however many eggs you are using, you double the number to find out how many ounces of the other ingredients to use. For example , in this post I am using 2 eggs, which means I use 4oz of sugar, flour and butter. This amount made 9 cupcakes, if you wanted more you could use 3 eggs and therefore 6oz of the other ingredients.

Here's what you'll need;
4oz Self Raising Flour
4oz Caster Sugar
4oz Butter/Margarine
2 Large Eggs
1tsp Baking Powder
1tsp Vanilla essence
Muffin Cases
We used a food processor but you could use an electric hand whisk or you can just mix it by hand. First of all you need to pre-heat your oven to 200°C/180°C Fan/Gas mark 6.
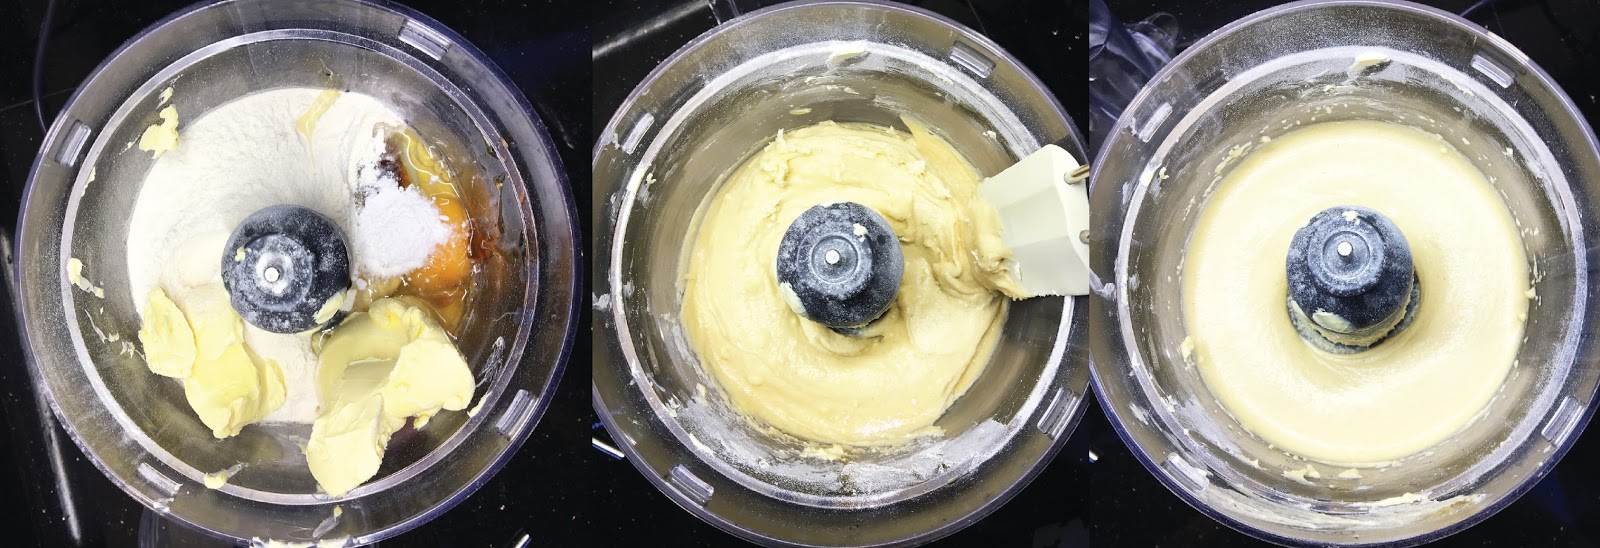
This really is super easy! All you do is weigh out all of your ingredients, tip them into the food processor and mix! You might want to stop and use a spatula to scrape down the sides at some point and if the mixture is looking too thick you can add a little hot water to loosen it. Try not to over mix it, you only need to combine the ingredients and then it's done!


Next you need to put your muffin cases into the tray so you're ready to fill them. Then just grab a spoon and start filling the cases! If you want to be a bit more accurate and have them all looking identical you could use an ice cream scoop.

Now you can put your cupcakes into the oven! They usually take between 20 and 25 mins to cook, so I would recommend setting a timer for 20 mins and then checking on them. You want them to be a lovely golden brown and springy to touch.

When your cupcakes are ready you can take them out of the oven and leave them on a wire rack to cool. We decided to decorate our cupcakes with buttercream! You could start to make the buttercream whilst you wait for them to cool.

Just a warning, we tend not to be very accurate when making buttercream.. We find that rather than using a recipe, it's just as easy to get a good consistency through trial and error.
So for the buttercream you need;
Butter/ Margarine
Icing Sugar
Food Colouring (if you want) we're using a pink one from Dr Oetker.
We find that it's easier to use an electric hand whisk for this part but you can use a food processor or just a spoon.

We started out with a generous spoon full of butter (I would guesstimate about an ounce or two), we then whisked it a little just to soften it and make it easier to add the icing sugar without making too much of a mess. We then poured in a good amount of icing sugar and mixed it in. Then give it a taste and if it's too buttery/too thick/too thin you can add more of either the butter or sugar until it is perfect! Then you can mix in the food colouring and you're good to go!

You could just spread the buttercream on with a knife but we wanted to pipe it on as it looks so pretty! So, we used a disposable plastic piping bag and a metal star nozzle. A good way to fill the piping bag with no mess is to drape it over a glass to hold it open and then use a spatula to get all of the buttercream in there. Once the bag is full squeeze all the buttercream down to the nozzle and twist the top of the bag.

We then took the bag of buttercream, squeezing as you go, and started to pipe. We started in the middle and piped around in a swirl ending on the outside. You can start on the outside and end in the middle which gives you the more classic cupcake swirl icing, but we also like to mix it up with this technique which looks a bit like a rose.

You could leave them at this stage, but we decided to add some white sprinkles and some edible glitter and don't they look pretty? Because, let's face it, a little bit of glitter makes everything better!

We hope you liked this post! Leave a comment if you want to see more baking posts, and don't forget to follow us on Bloglovin!
Love, Antonia and Imogen


